Blog 7 Building The Ultimate BBQ Cooker
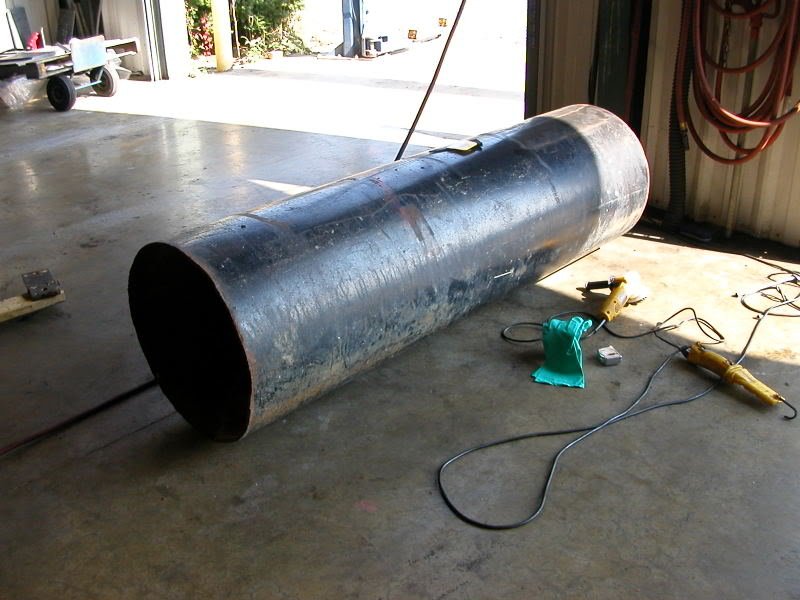
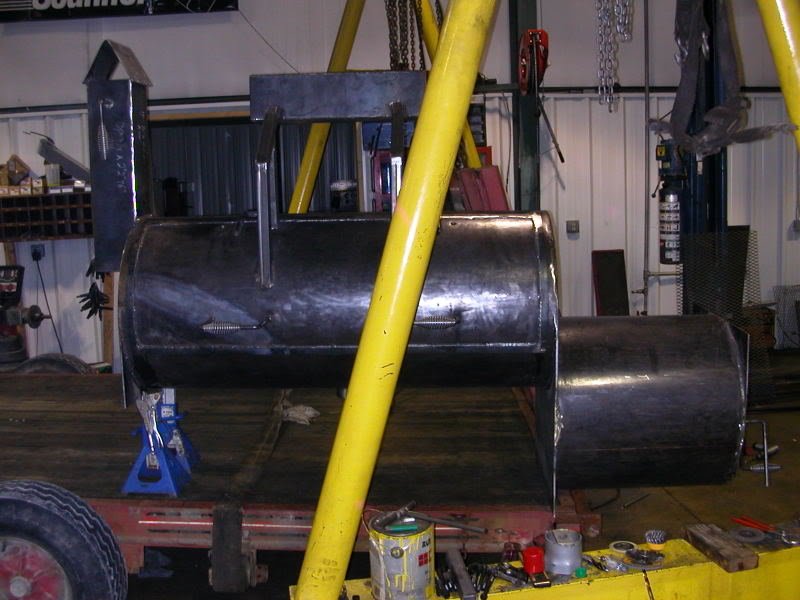
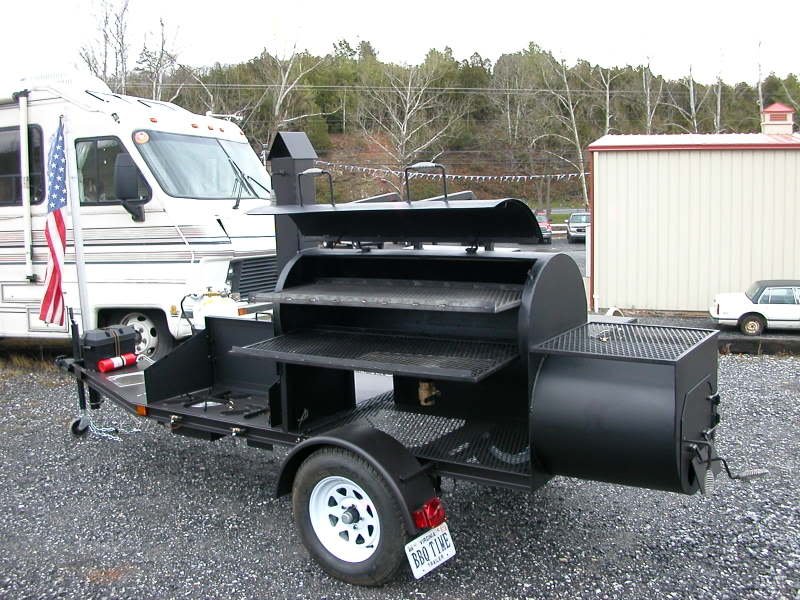
If you've read our posts about Hogback’s history in barbecue you'll remember our frustration with cheap barbecue smokers from big box stores back in our early days and the issues we were having with them. We decided to build a barbecue cooker that could cook all year with no problems in severe weather. We started searching to find a large 1/4" thick wall pipe, preferably 24" or 36" in diameter to built a barbecue cooker out of. In August of 2007 we found a large pipe that had 3/8" thick walls and was 24" in diameter and purchased a 7-foot section for around $400. The section of pipe was part of the pole that held the fuel prices high in the air over exit 205 of I-81 in Raphine, Virginia just across from White's Truck Stop. I then spent countless hours online looking at every barbecue cooker I could find and how they were designed. Then based on the functions I would determine what I liked best about the many different styles and features, and I would design similar features into our cooker. Our plan was to build an offset cooker and once it was complete we would find a trailer to mount it on to make it portable. The first thing was determining the length needed. I knew I'd like to be about to cook at least 20-24 pork butts at one time so this meant the food chamber of the cooker would need to be about 5 feet in length with a firebox of the same size in diameter and 2 feet long.

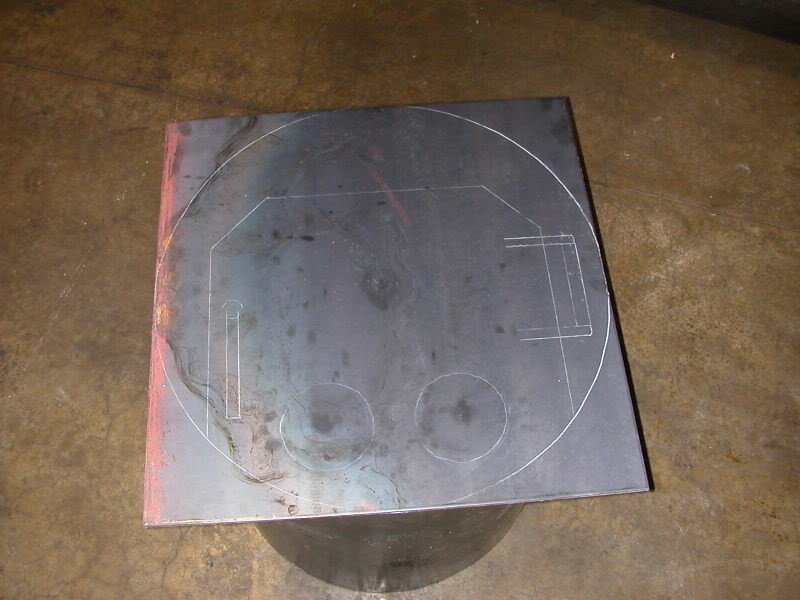
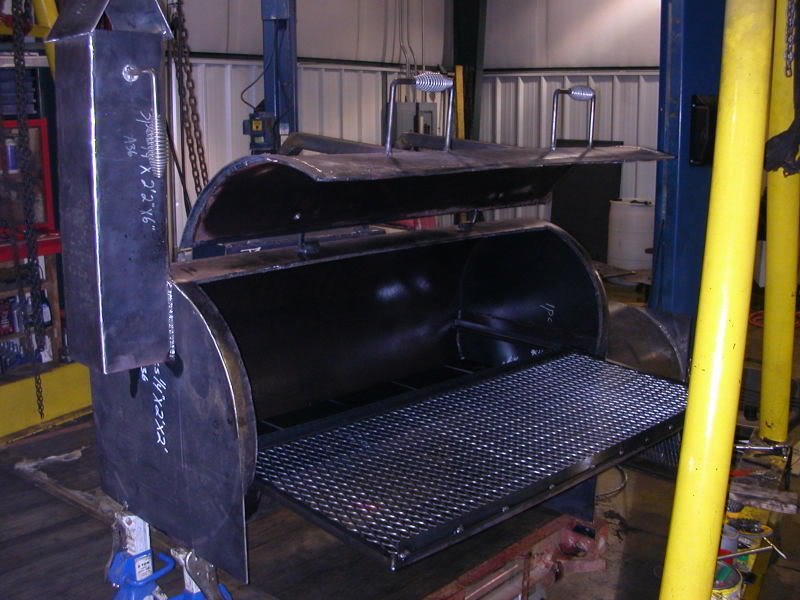
We wanted to have the option to cook a small whole hog or pig, so this meant I needed one large food chamber door instead of two small doors. With the pipe having 3/8" thick walls my calculations were this door would be a little over 100 lbs in weight. It would take a strong man with a great back to open and close the door so a counterweight was added to the design to aid in this. The counterweight on the door makes the door very light and can be opened very easily by anyone. The next thing we had to consider is how to get an even temperature throughout the cooker. The firebox is mounted on one side so it will be much hotter on that side of the food chamber. To prevent this from happening we added tuning plates to the design. Tuning plates are 1/4" thick squares of plate steel and are placed with small air gaps that can be adjusted (tuned) to keep the heat from the firebox below the food chamber until it reaches further areas away from the firebox before entering the food chamber. This provides an even temperature throughout the food chamber once they are tuned correctly. Next was the intake and exhaust draft controls.
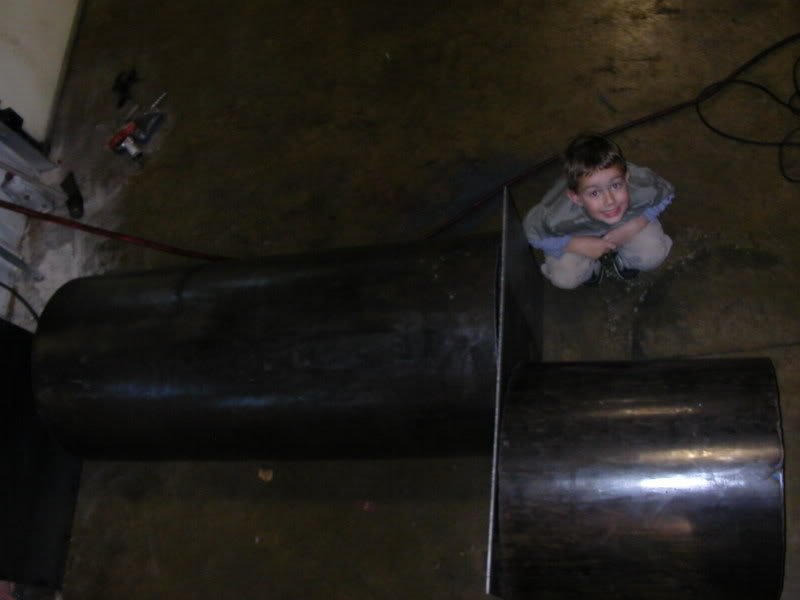
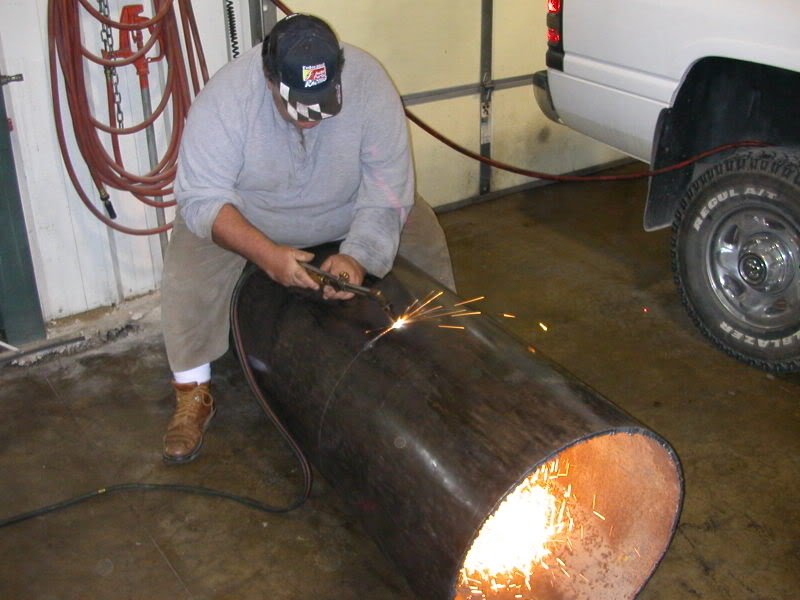
Pipe cut to make food chamber and firebox.
These controls allow you to raise, lower, or maintain the current temperature inside the food chamber. Typically the exhaust control stays wide open and is only shut in an emergency in case of fire or the temperature inside the cooker gets really hot. The intake air draft will be used to control the food chamber temperature along with fire management when everything is cooking correctly. If you need to raise or lower the temperature just open or close the intake draft a little, giving the fire more or less oxygen. For the food racks, we wanted an upper and lower rack and also wanted them to be able to slide in and out as needed.

Drawing Layout
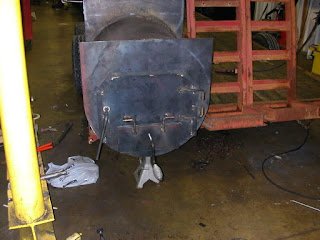
Finished Cuts and Weld Up.
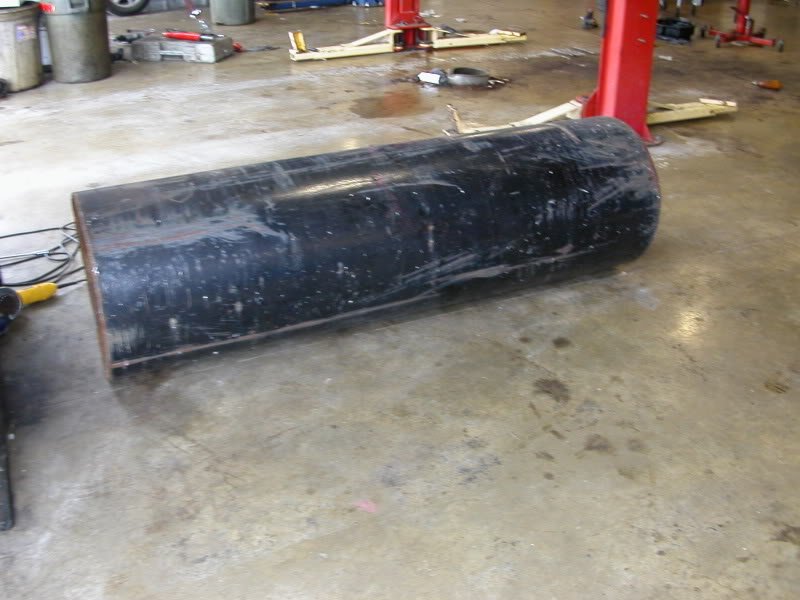
As barbecue cooks through the night, lots of fat is rendered into grease and you need to get the grease out of the cooker, we added a 2" ball valve to the bottom of the food chamber for a grease drain. In early October after about 40 hours of research and designing everything on drafting paper we were ready to begin fabrication. The first task was to remove all paint from the old pipe and get it back to bare metal. This proved to be far more difficult than you could ever imagine. The paint turned out to be powder coating and no chemical would help remove it. I went to work with a 4" grinder and sanding disks and slowly we began to see a growing area of bare metal. It took 20 hours and $120 worth of $4 sanding disks to get the pipe totally clean. Next, it was time to start fabricating and welding. Marty Strecker, Wayne Reese, Stephen Showalter and I worked on the build. We cut the pipe into two pieces, the firebox, and the food chamber. All other metal used for the build was new metal plate steel, square tubing, angle iron, and 3/4" expanded metal for the grates. Every item that was fabricated was first made out of cardboard and once the fit good was traced onto the metal and cut to spec before being welded in place and ground smooth. Working 20 hours a week at night. By Christmas, we had everything together and decided to give the cooker a test run to make sure nothing needed to be changed before mounting it to a trailer. It looked like a dream as you can see in the pictures.
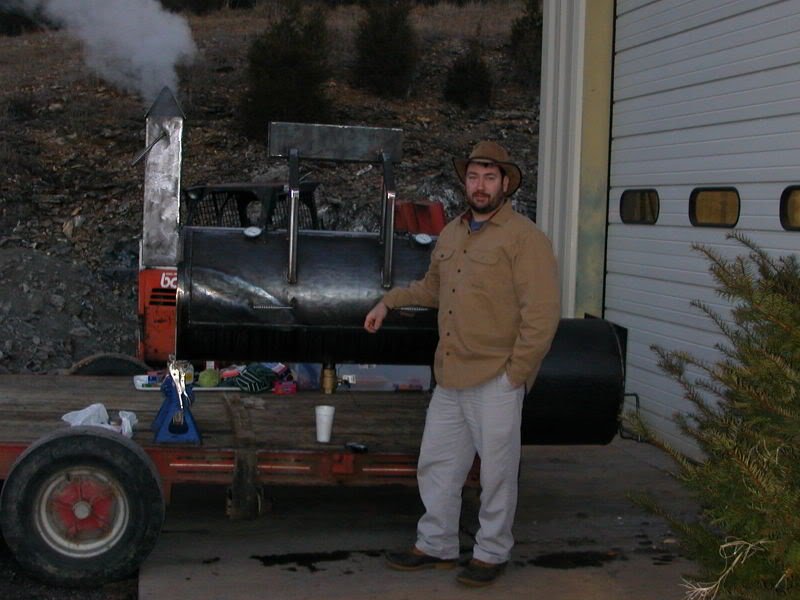
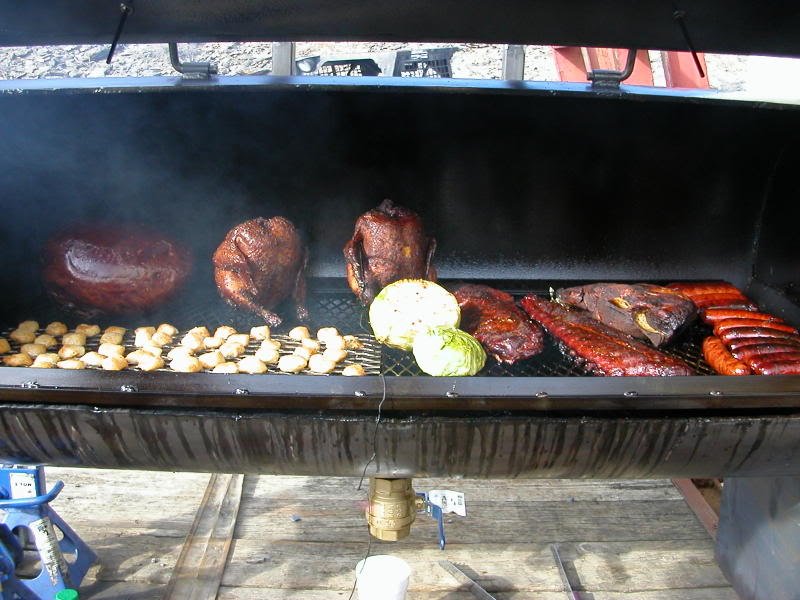
Test Cook on Christmas Eve 2007
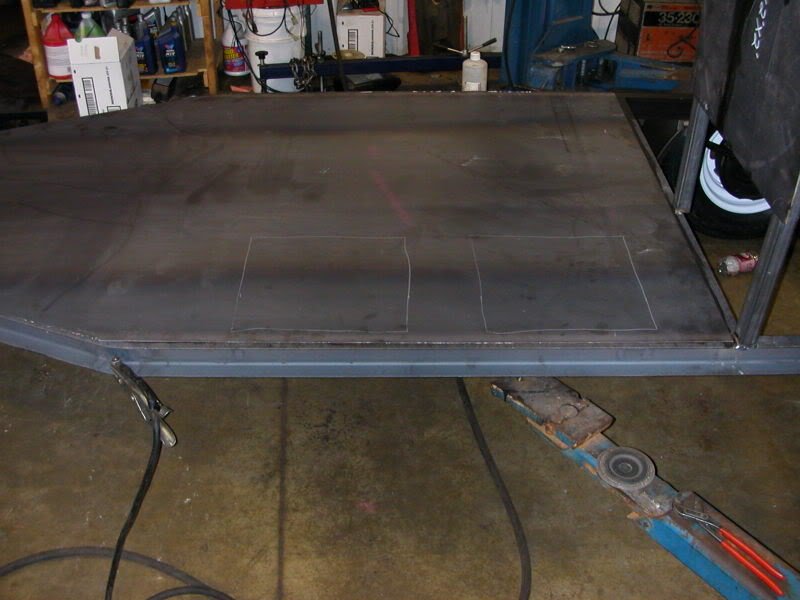
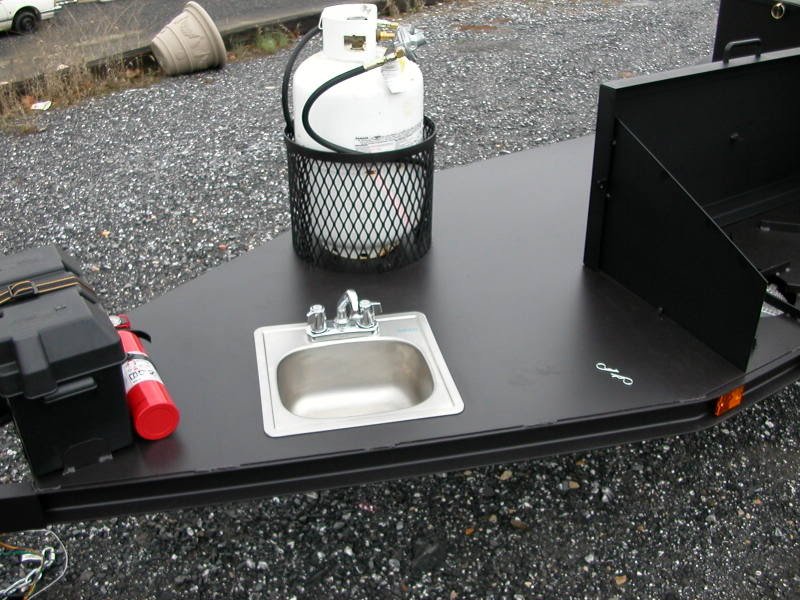
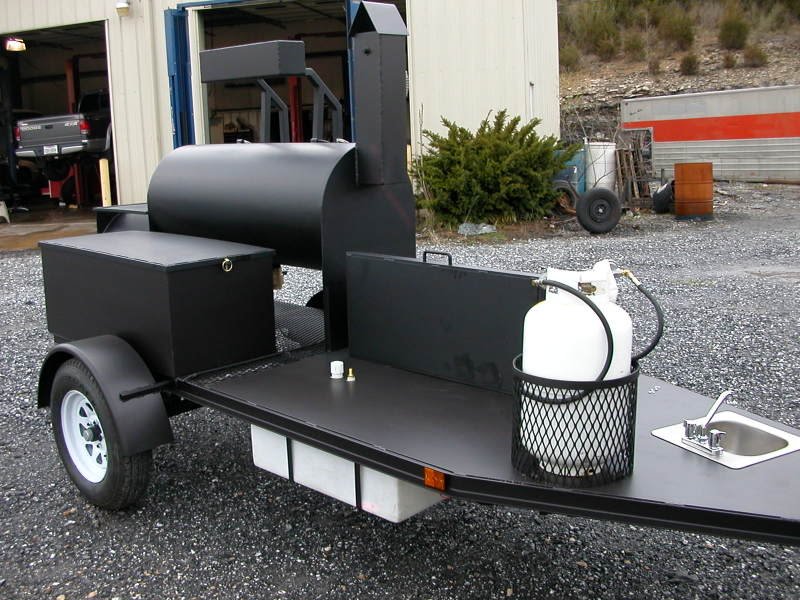
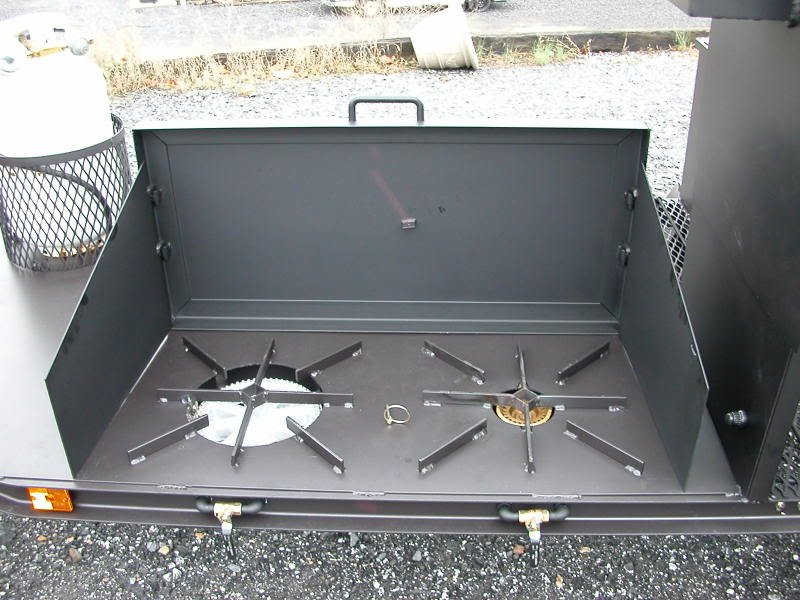
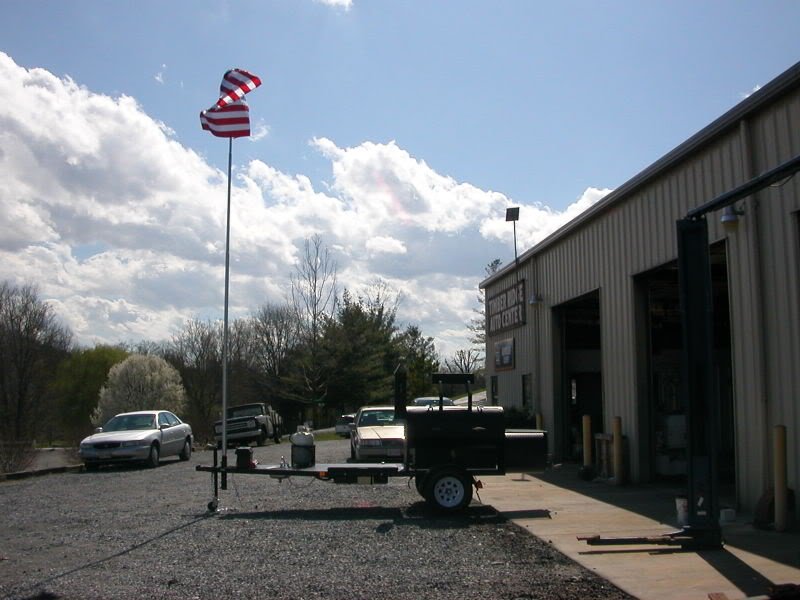
I decided to go to Tractor Supply and buy a 2000 lb trailer to mount the cooker on. We brought the new trailer into the shop, raised the cooker in the air, placed the trailer under it, and lowered the cooker down onto the trailer to weld it in place. We immediately found big problems. Our well-designed cooker was so heavy that when the cooker was placed on the trailer, the frame squatted down onto the tires. The cooker was just too heavy for this trailer and we decided based on how good we had done with the cooker that we'd just build a heavy-duty trailer to hold it. It was back to the drafting paper and a whole bunch of new ideas. If we had to build a trailer, why not design it more useful for cooking? We decided to build a cooker trailer that would have everything needed to be able to pull it on top of a mountain and cook a meal. With this in mind, we decided the trailer would have a flat deck and two 15" burners would be mounted for cooking. One would have an 80,000 BTU burner and the other would have a 150,000 BTU hi-pressure crab boiler to cook large 20-30-50 gallon pots on. We fabricated a cover similar to the old Coleman camping stoves that had wind guards.
If we planned to be able to cook anywhere we'd need a sink and water supply so we added a deck-mounted sink, and a 20-gallon potable water tank underneath the trailer with an RV water pump and marine battery to power it. Next, we'd need hot water or a place to keep things warm so we added a warming rack above the firebox so you could slow heat water or keep a side dish hot if needed. We'd need to haul wood and keep it dry so a wood storage box with a lid was added next. We built this box with 1/8" thick plate steel and the size specs were matched to what we needed for this wood storage box to double as a charcoal grill along with a chicken rack to cook 28 chicken halves on it. The box dimensions were 2'x4' with a lid that could be used as a table for prep work.
Additional deck space was perfect for two large 150-qt coolers to set on and be strapped down for transport. Last but not least my good friend Larry Weeks gave me a 20ft telescoping flag pole which we made an adapter to mount it on the front of the trailer and fly ole glory when we were cooking. The trailer was fabricated out of 3" c-channel steel, we custom-ordered a 3500lb axle designed specifically to fit our trailer. It was another 3 months of working 20 hours per week before the cooker would be ready for painting. We left the painting to the pros at Goads Body Shop. They painted the entire trailer and cooker with 1800-degree hi-temperature grill/stove paint. Early April 2008 she was complete and we had the cooker of our dreams! Within a month, we had her at the Virginia State BBQ Championship cooking against 58 professional barbecue teams from all over the USA. We won our first award that weekend with a 10th-place call for pulled pork. If you would like to know what this cooker build leads to, check out the blog about Hogback’s History in Barbecue. Enjoy the slideshow below as it tells the story of our cooker build from start to finish.